Once payables are generated, they should be reviewed and approved. There are three ways to navigate to the Payables page, as seen in Figure 3 below.
1. From the Study Landing Page, click on the Payables hyperlink in the Payments Module.
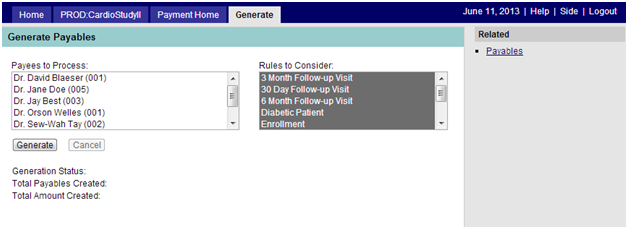
2. From the Generate Payables page (shown in Figure 1 below), click on Payables in the sidebar
Figure 1: Generate Payables Page - Payables

3. From the Payments Landing Page (shown in Figure 2 below), click on Browse Payables in the Ongoing Tasks category
Figure 2: Browse Payables
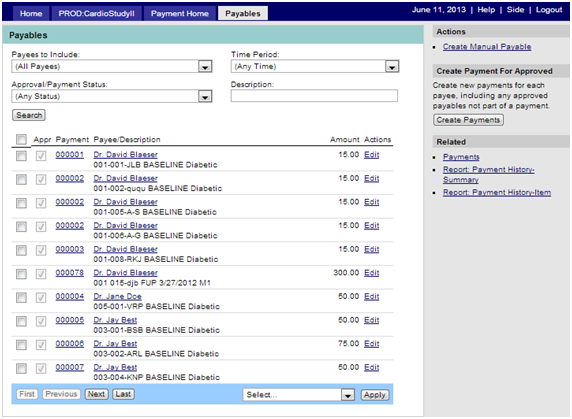
From the Payables page, the authorized user will review and approve payables.
Figure 3: Payables Page

Upon first opening the Payables page, all payables ever generated will appear. These records may have been approved or not; may have been assigned to a payment or not. If a payable has already been associated with a payment, there will be a payment number in the Payment column. If a payable has already been approved, there will be a check in the “Appr” (approved) column. Records may have a check automatically placed in the “Appr” (approved) column if when assigning payees to rules (or rules to payees) you clicked on the “Auto/Approve” checkbox. (Reference Assigning Rules to Payees.)
Filters may be applied to more narrowly focus the records visible. For instance, if you only want to view/review the non-approved payable records, you may perform a filter on the Approval/Payment Status and choose: “not approved for payment”. Or if you wish to view records that have been approved but not yet associated with a payment, choose: “approved, not part of payment”.
There are several filtering choices available and you may apply more than one at a single time:
The actions listed below (and displayed in Figure 4 below) may be selected to apply to payable records. Once the desired records are selected, choose an action to apply to those records. Only one action may be applied to a given set of records in a single application. For instance, you must approve a payment before you can add it to an existing one or add to (create) new payment.
Figure 4: Payment Actions
