There may come a time when you would like to pay a reimbursable, study-related expense from MAESTRO. Using the Create Payable page, a payment may be created for a specific payee and combined with other payables or processed separately.
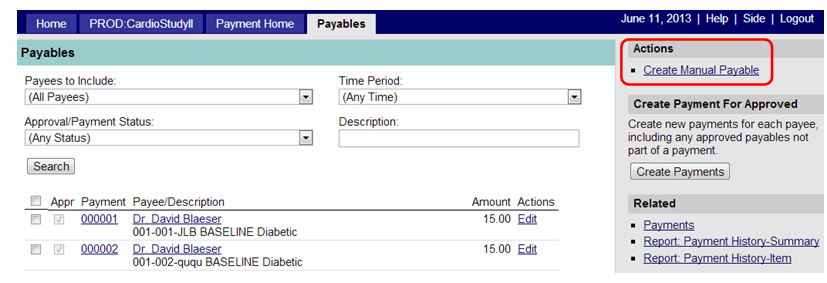
To access the Create Payable page, from the (Browse) Payables page (shown in Figure 1 below), select the Create Manual Payable hyperlink in the sidebar.
Figure 1: Payables Page – Create Manual Payable Hyperlink

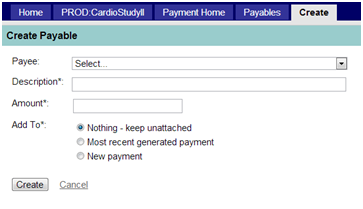
By clicking on the Create Manual Payable link, you navigate to the page below in Figure 2.
Figure 2: Create (Manual) Payable Page

From this page you will create a manual payable. See Table 1 below for available fields.
Table 1
Payee*: |
Using the look-up table, select the payee to assign to this payment. (Note: If the payee name does not appear in this table, refer to Section 3.1.1 above to add a contact/payee.) (*Required field.) |
Description*: |
Enter the description of the payment. (*Required field.) |
Amount*: |
Enter the amount of the payment; numbers only; no currency characters. (*Required field.) |
Add To*: |
Choose from the following:
(*Required field.) |
Click the “Create” button to process the desired action or “Cancel” to return to the previous page without saving changes.