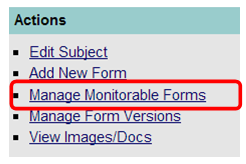
The “Monitored” flag is used to indicate that a CRF should be monitored. To mark a CRF or group of CRFs for monitoring, from the Subject Landing Page select the “Manage Monitorable Forms” link in the Actions sidebar. Refer to Figure 1 below.
Figure 1: Manage Monitorable Forms

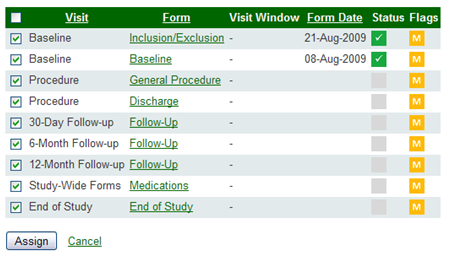
You will navigate to the screen shown in Figure 2 below where you will select the CRFs that need to be identified for monitoring by clicking on the box/es to the far left of a particular CRF. Once CRFs are marked for monitoring, click on the “Assign” button at the bottom of the page. The “M” flag will change in color from gray to yellow.
Figure 2: Manage Monitorable Forms CRF Selection Page

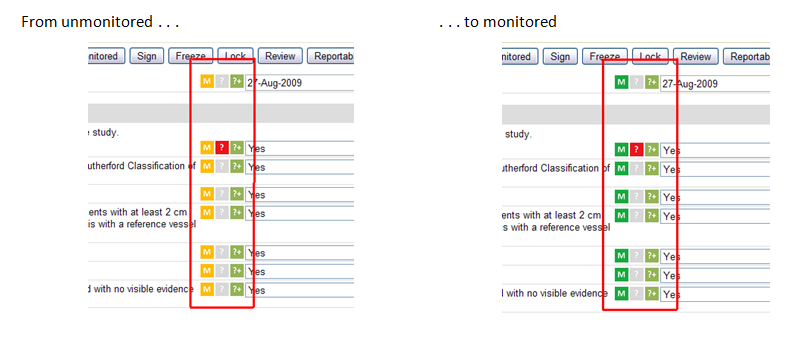
Once data has been monitored, there are two ways the monitor can mark the CRF (or only certain data points on that form) from within the CRF: 1) Click “Monitored” in the menu bar at the top of the CRF (see Figure 3 below) if the entire CRF has been monitored; or 2) Click on the “M” icon next to the data point/s monitored (see Figure 4 below). Either of these actions will change the flags from yellow to green.
Figure 3: Marking a CRF as Monitored

Figure 4: Marking a Data Point as Monitored
