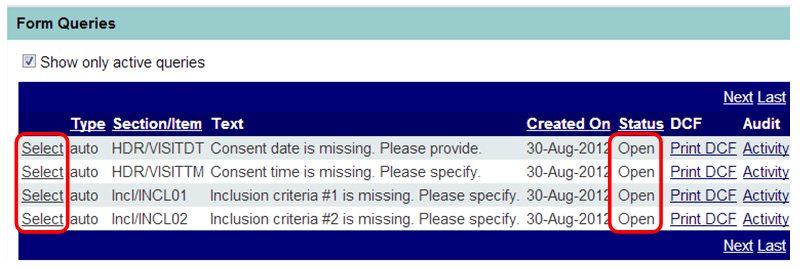
The site’s study coordinator is typically the individual that will respond to a data query. If the query is for a study using remote data capture, the coordinator will be able to see at a glance from the Subject Landing Page if any outstanding queries exist by looking for any red query icons. [Note: A report may also be generated which will summarize all open data queries. See HYPERLINK for more information about query reports.]
A user may select from the following methods when replying to a query:
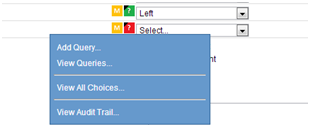
Open the CRF and hover your mouse on the red query flag which will display a modal window (Figure 3 below) giving you several options: Add Query, View Queries, View All Choices (if there is a look-up table associated with this field) or View Audit Trail. Each option is further described in Table 1 below. Answer the query by following Option 2: View Queries.
Figure 1: Queries Form

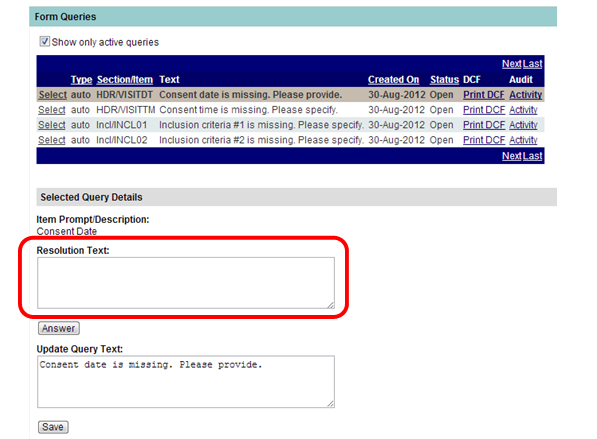
Figure 2: Query Response Screen - Original User Interface

Figure 3: Query Flag - Modal Window

Table 1: Modal Window Options
Option 1: Add Query (if the user has appropriate permissions to do so.) Click on Add Query to add query text. Type the query text, click on the Create button to save your changes, or Cancel to return to the previous screen without saving your changes.
|
Option 2: View Queries Click on View Queries to view all queries associated with that data point. Reply to any open queries by clicking on the Open hyperlink (in the Status column) associated with that query.
Type the resolution text, then click on the Update button to save your changes, or Cancel to return to the previous screen without saving your changes.
|
Option 3: View All Choices Click on View All Choices to see drop-down table choices for that field if the form is Locked or Frozen. Click on Cancel to return to the previous screen.
|
Option 4: View Audit Trail Click on View Audit Trail to see a list of the dates/times of changes and name of user who entered data in this field. Click on Cancel to return to the previous screen.
|