The individual(s) given permission to approve queries (typically the monitor or data manager) will see yellow icons on the Subject Landing Page or CRF for queries that have been answered and are ready to be reviewed and approved.
a) To view the queries for a data point, click on the yellow question mark icon next to the CRF (if on Subject Landing Page) or next to the field in an open CRF as shown in Figure 1 below.
Figure 1: Query Icon
![]()
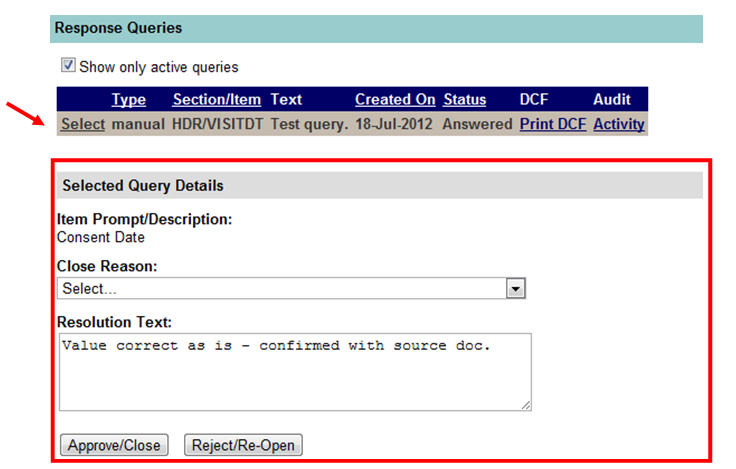
b) You will navigate to a screen showing the query or queries associated with that data point. Clicking the Select link in the top left shaded portion will display Selected Query Details in the bottom portion of your screen as shown in Figure 2 below.
Figure 2: Select Open Query - Type Resolution Text

c) Select a “Close Reason” (e.g. no source document; not measured; correct as is; corrected value; self evident correction; sponsor misinterpreted; logic changed; or other) then click either “Approve/Close”, or “Reject/Re-open”. The resolution text may be updated at this time to provide additional clarification if necessary.
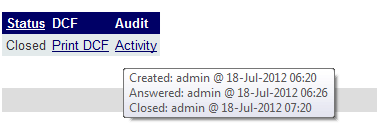
d) By hovering the mouse over the “Audit” field “Activity” link, a popup window will show activity for that query. (Queries must be closed for this to be visible.) See Figure 3 below.
Figure 3: Query Activity Summary

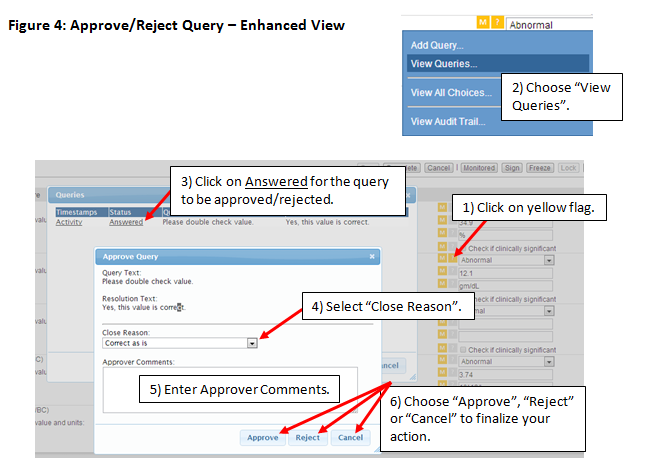
To view the queries for a data point while using the Enhanced user interface, click on the query flag:
1) next to the CRF in the Subject Landing Page (reference Figure 2 above and follow steps c) and d) immediately below that figure); or
2) next to the field as shown in Figure 4 below and follow the steps sequentially as shown.
