There are two ways to replicate a master document and apply it to a specific study, site or contact:
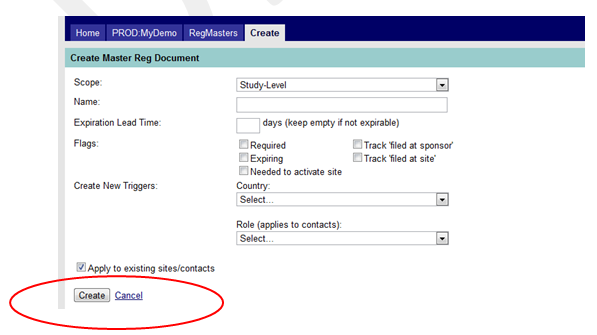
- As mentioned above, when adding a master document, ensure you have the “Apply to existing sites/contacts” checkbox checked (circled in red in Figure 7 below.) MAESTRO will automatically create a copy of that master document for all existing sites or contacts (as indicated in the Scope field for each document) when that document is created. Additional fields (expiration date, effective dates, sent date, received date and comments) will need to be completed at the document level via the editing mode.
Figure 7: Apply to Existing Sites/Contacts

- If additional sites or contacts are added to MAESTRO after your master documents are created (you may add more at any time) you must manually add/assign a document to a site or contact. From the study landing page, click on the link to the Documents screen from within the Regulatory Docs module.

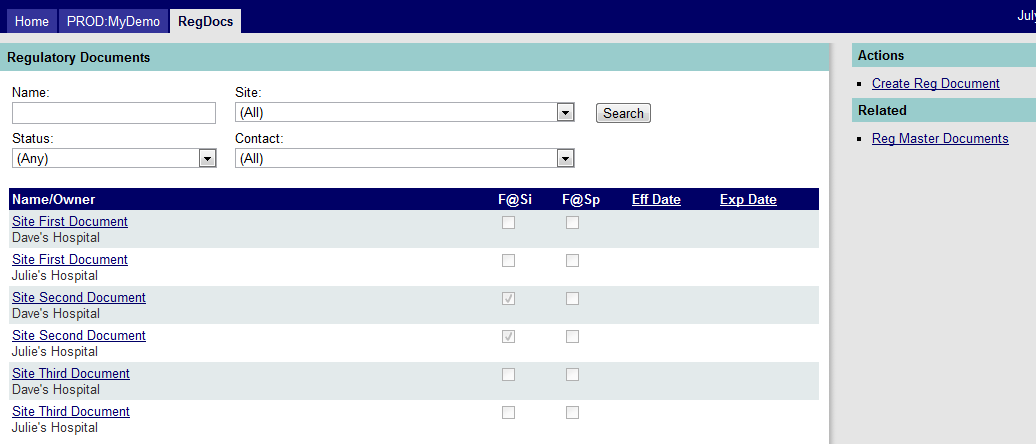
3. Click on the Create Reg Document link, circled in red in Figure 8 below, to enter the Create Reg Document screen (Figure 9 below) to add a new document to a site or contact.
Figure 8: Link to Create a Regulatory Document

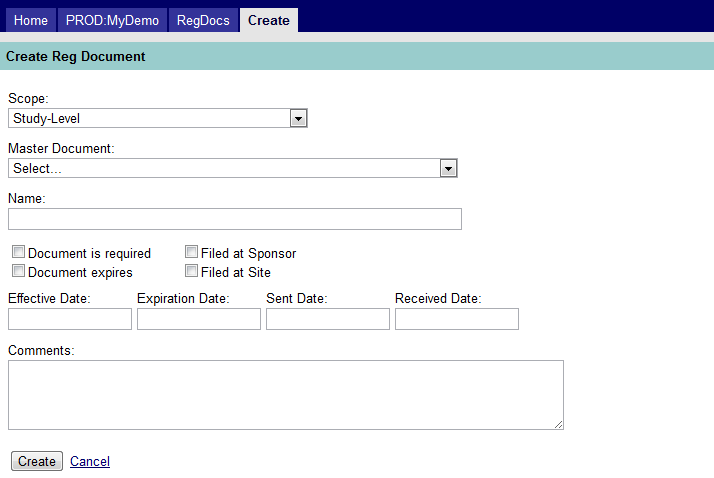
Figure 9: Create a Regulatory Document

The above screen capture shows the following fields:
- Scope. Your choice for this field will indicate whether the document applies to the study, a site, or contact. The value selected will determine what other fields will be displayed in this screen, as indicated below.
- Study-Level – Select this if the document is a study-level document.
- Site-Level – A dropdown list of sites is shown; select a site to create a site-level associated document.
- Contact-Level – Choose a contact from the dropdown list (shown along with the number assigned to their site) to create a contact-level associated document.
- Master Document. Choose the document type (i.e. master document) to assign the study, site or contact-related document.
- Name. Type the same name as what was assigned to the master document (visible in the field directly above). This is a required field.
- Flags. The only flags carried over from the master document are “Required” and “Expiring”. The user must verify that the document is actually on file with the Sponsor and Site and if so, check the appropriate box(es).
- Dates.
- Effective – the effective date of the document
- Expiration – the expiration date of the document, if it expires
- Sent – the date that a request for the document was sent (optional)
- Received – the date the document was received (optional)
- Comments. Enter any comments you wish to add to the document.
To save the document, click on the Create button. Once a document is saved/created, the actual document (or signature page) for that document may be uploaded to MAESTRO. The file is stored on the MAESTRO server alongside the clinical data for the study.


