To return a product from a site to a distribution center or warehouse, follow the steps below.
Step 1: From the Study landing page, click on Products in the Product Tracking module as seen in Figure 1 below.
Figure 1: Product Tracking - Products
![]()
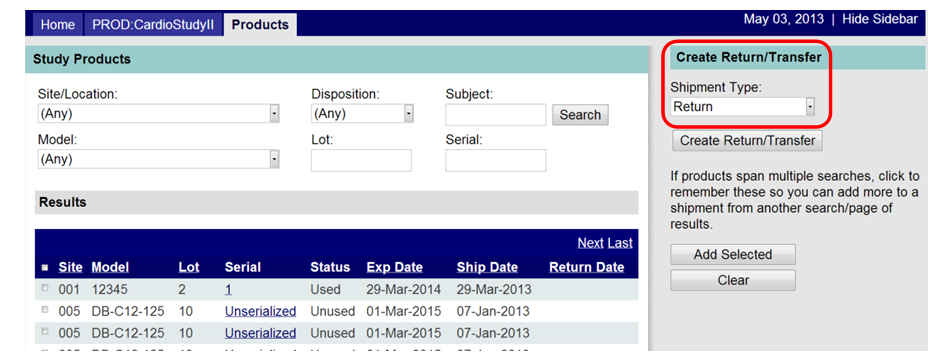
Step 2: The Products landing page displays products in inventory at sites. In the Create Return/Transfer side bar, the Shipment Type default value displays “Return” as shown in Figure 2 below. Leave this value as “Return”.
Figure 2: Products Landing Page

[Navigation Hint: Clicking on any underlined column heading (shown as white text in a solid bar), sorts that column of data in alternating ascending/descending order.]
Step 3: The products displayed in Results (with no filters applied) reflects all items in inventory at all sites. To narrow the focus of product results, run one or more filters by typing your selection in the space provided or choosing from the available drop down lists as shown in Figure 3 below. Once you’ve chosen your filters, click on the “Search” button to view the results. The product results will be limited to products reflected by the selected filters. [Note: Any entry in the Lot, Subject or Serial filter fields will produce results that contain the numbers/letters entered. For instance, if users enter a “3” in Lot, the results could contain all records that contain a “3” (e.g. “1300”, “H-342”, “33” etc.) Using multiple filters will more narrowly focus the results.]
Figure 3: Products Landing Page - Filters

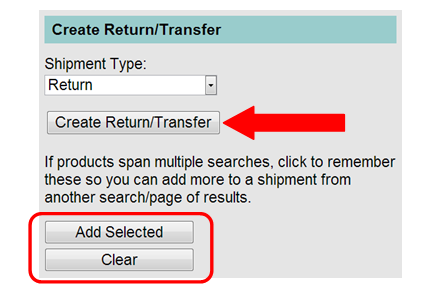
Step 4: Select the product(s) being returned by clicking on the checkbox next to the product(s) as shown in Figure 4 below. Clicking on the very top check box (displayed in the solid menu bar) selects all items currently visible in the results on that page. Users may return as many products as are displayed/filtered, reflecting products that are currently in inventory at a site. If the products extend beyond the visible results to additional pages, click on the “Add Selected” button before moving to another page. To clear any product selections and to begin afresh, click on the “Clear” button. See Figure 5 below.
Figure 4: Selecting Products to Return

Figure 5: "Add Selected" or "Clear" Buttons

Step 5: When users have completed their product selection(s), click the “Create Return/Transfer” button shown near the red arrow in Figure 5 above.
Note that the product selections will stay selected until users do one of the following:
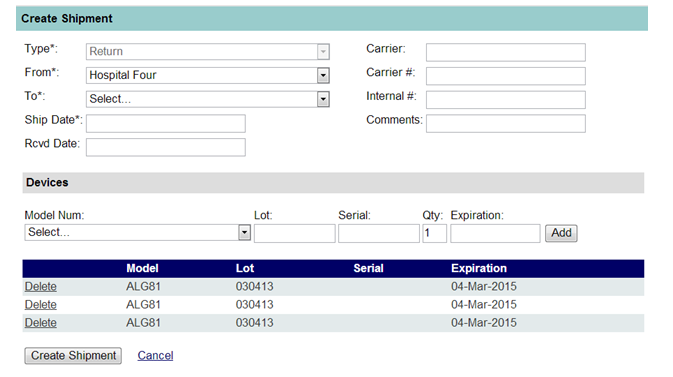
Note that the products that were selected on the previous screen are now visible on the Create Shipment screen, as shown in Figure 6 below.
Figure 6: Create Shipment - Products
