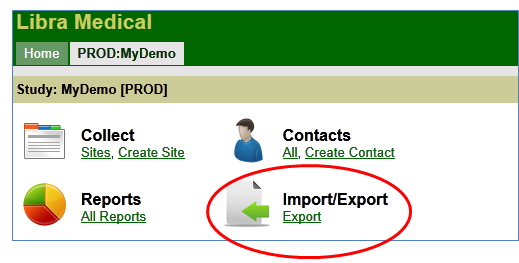
In your specific study screen, there will be an icon for “Import/Export”, click on the “Export” link.

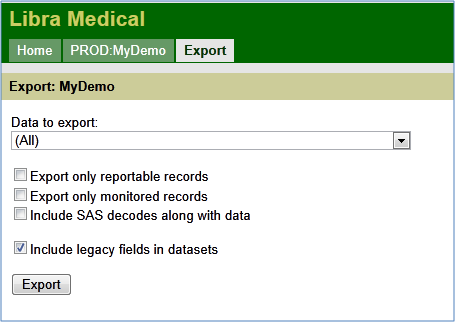
From here you can select from many different types of export data, by clicking on the dropdown under “Data to export”. Keep in mind the following:
- By default you will get all active (not deleted) records.
- To only get the records that are marked reportable, check the “Only Reportable” check box.
- To only get the records that are marked monitored, check the “Only Monitored” check box.
- The reportable and monitored indicators are ANDed when producing the dataset.
- If checked, the legacy fields include things like form status, coded values for any choice (pick one) question. It is recommended that you check the “Include legacy fields in datasets” box before clicking “Export”.
- If you select “(All)”, you will get all available data export files for your specific study, depending on your user rights.
- The reports available for you to export are based on the CRFs for your specific study and User Rights.

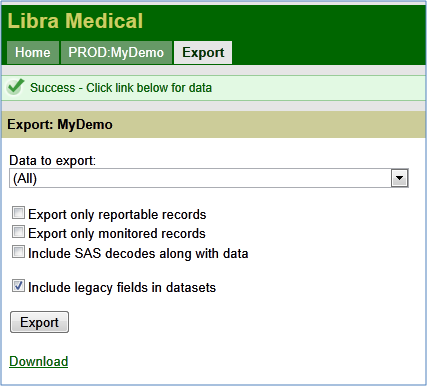
After clicking “Export”, the system will run the export and a new screen will show up with the following message: Success – Click link below for data. Click on the “Download” link.

This will then open a new dialog box (depending on your web browser) which will ask you to open or save the data. Note the following:
- If you selected “All” for your data export: When you click open, all of the data export files will be saved into a temporary folder on your computer. If you click save, all of the data export files will be saved into the folder you specify (this is the recommended option).
- If you selected a specific report: When you click open, that data export file will appear in a new Excel session. If you click save, the data export file will appear in a new Excel session as well.


